There will be several posts about using the cheapest MCU board from China. So called Bluepill- PCB containing STM32F103C8T6 microcontroller, USB connector and some small elements. For a few bucks/euros we have upto 72MHz CPU, 64Kb of ROM and up to 20kb of RAM. Up to 100 millions instructions on one chip.
As all ARM chips it needs quite complicated initialization code and peripheral configuration. And there are tons of peripherals on the same pin. Manufacturer of the chip, STMicroelectronics, decided to make a graphical tool for chip configuration and init libraries. Also, they included some libraries for peripherals from simple GPIO to complex USB or fat file system. And all the stuff is compatible with generic GNU C (gcc) available free from ARM holdings and other sources. Same compiler is used in the well known learning system arduino, but without the use of quasi language extension. All software can be portable to any other platform and system. ’cause it is ISO/ANSI standard!
This tool is called STM32CubeMX (stand alone tool). First versions were extremely bad and full of bugs. After several years it became usable, but still there are errors, bugs and undocumented features.
This is an intro article, tutorial about how to build your first project with lots of pictures. Sorry, this blog version is not updated to the new width of the pictures. Will be fixed soon.
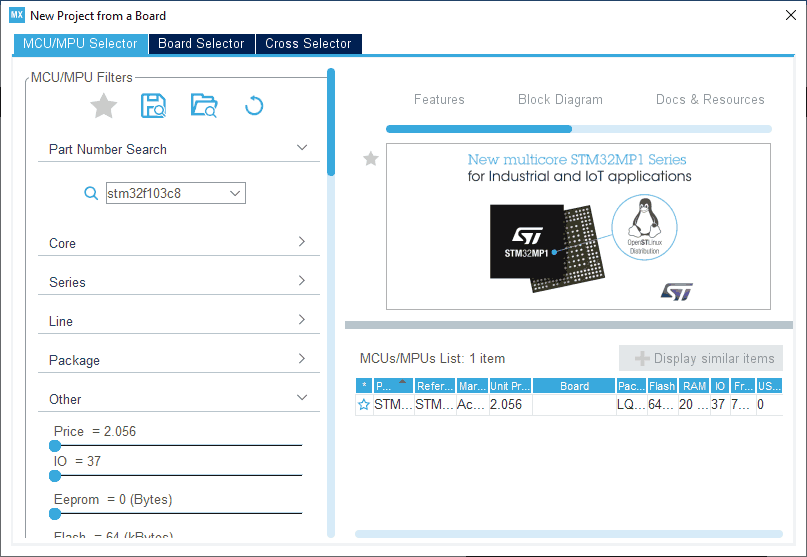
After starting program (called “cube” later in the text), we can select dev board (no bluepill) of just MCU part number. After pressing on the partnumber we have next window:
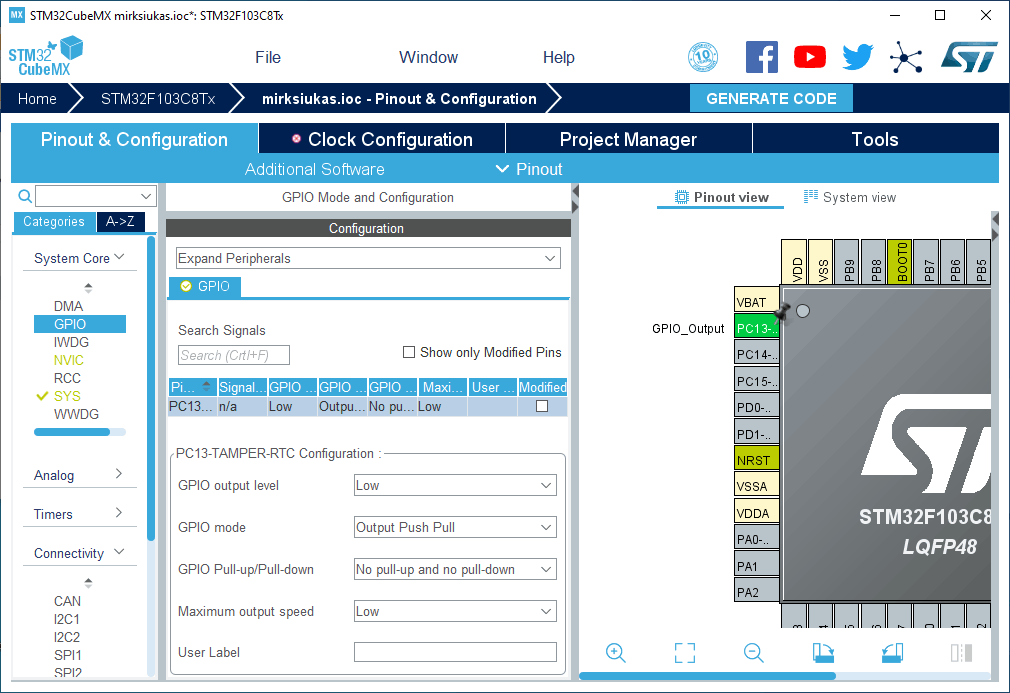
Now we can select what peripherals or system items we will use in our project. Our board has an LED connected to the PC13 pin, so just press on the pin image and select GPIO mode for output. We want to output something here.
Every MCU must have some clock source. Either internal, either external:
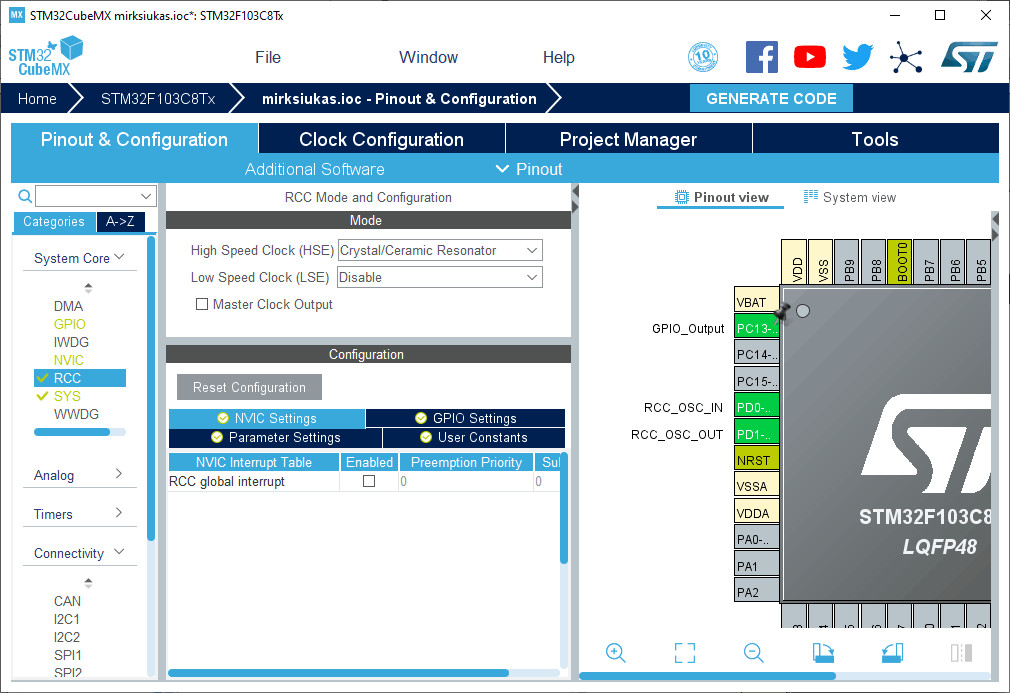
Our board can use 8MHz crystal for main clock and for slow clock we can use 32kHz crystal- for real time clock or second tick. These selections are done in the RCC configuration.
This chip has some complex clock hardware with PLL. All these configs and problems can be solved pressing “clock configuration” tab:
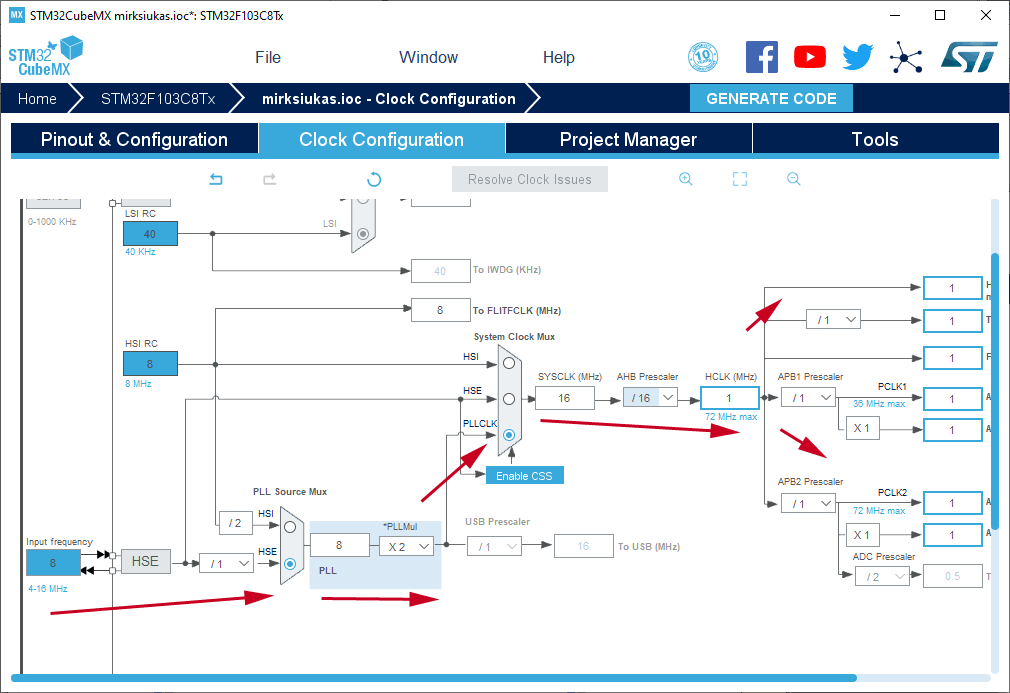
Red tabs show the system clock flow from source to internal and external parts of the chip.
Now we must select what integrated development environment (IDE) we will use. I am using plain gcc without any, so I select “make” – “makefile”:
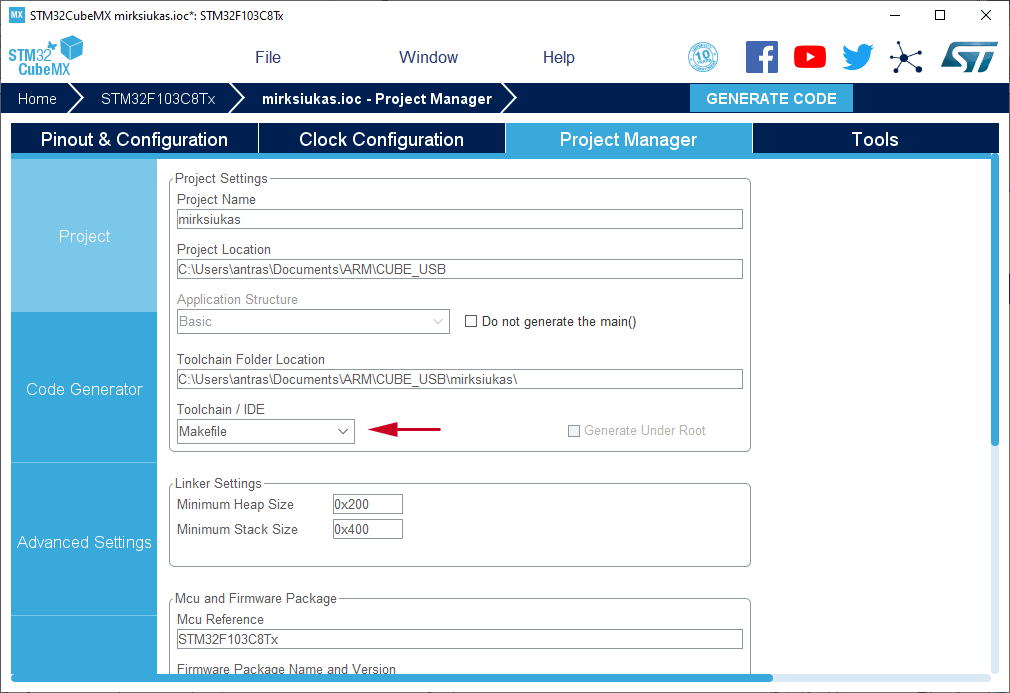
Also, we name the project and select the place where all the files will be stored on your hard disk. Other options are not used on the current project, maybe I can note that in “code generator” tab we can select to copy only the needed libraries, not all.
After pressing “generate code” we will find the working and compilable skeleton of our first program. The program will initialize all the stuff, but will do nothing. I forgot to mention in this article to select “serial wire debug” in SYS mode and configuration. In the next article I will show it.

Now we can open the folder containing all the stuff and start “real programming”.
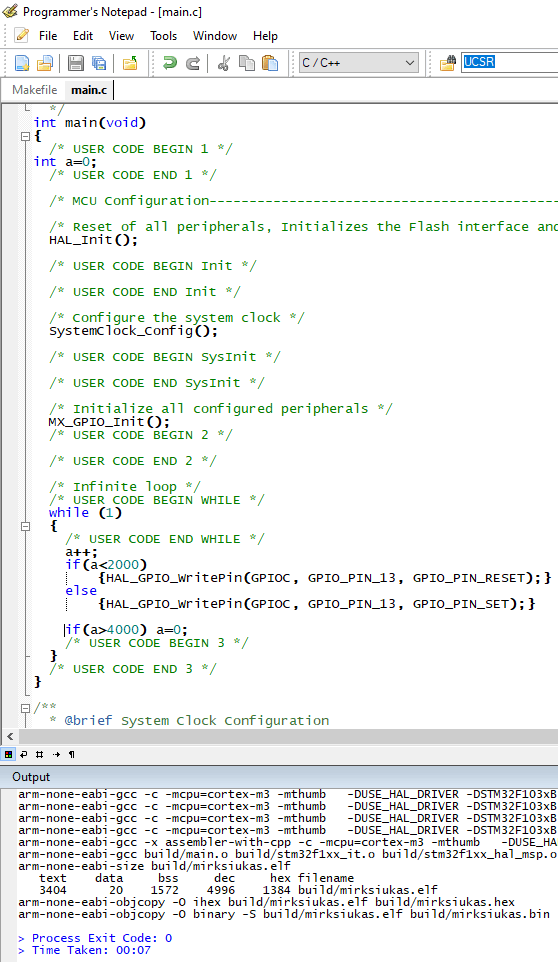
Compare this image with your generated source code. I just added some self explanatory lines to blink LED. It is not an effective way to do it and it is not using any fancy hardware- just writing some value to GPIO, software delay and writing another value. Result- the LED will blink. This program is not using real HAL delay… (HAL – it is a system of libraries to be used with this chip). This article is just showing that it must compile without a single warning and will show some “heart beat”.
I am using also the cheapest programmer from China to program the chip- ST-Link. To make the firmware programming from same text editor, I added few lines to the “makefile”:

There is a bug in the current version of the cube- after code regeneration it will not compile complaining about some errors in makefile. Just delete one line in the code– the are duplicated lines of includes. After next code regeneration the error will not appear.
Also, I add additional makefile in “Src” folder to compile the firmware from source folder:
all:

$(MAKE) all -C ..
program:
$(MAKE) program -C ..clean:
$(MAKE) clean -C ..
Wait for the next article with all the files included. This article is only an introduction.
Original article in Lithuanian language in my main blog.
